

How to Use Starbond Black CA Glue for Wood Knots: Farmer Vic’s Guide (2026)
I recently pulled a stunning slab of cherry off my mill, and as much as it's my favorite wood to work with, it had a few stubborn knots that threatened the final look. We've all been there; you pour your heart into a piece only to have your glue soak into the grain or leave tiny, annoying bubbles right where everyone will see them. It's frustrating when a simple repair turns into a sanding marathon that eats up your afternoon. That's why I've spent years refining how I use starbond black ca glue for knots in my own workshop. Whether I'm working with lumber I've milled myself or red oak boards I've picked up from the local yard, getting a flush, professional finish is non-negotiable.
You want those knots to look like a deliberate, jet-black accent rather than a messy mistake. I'm going to share the exact methods I use at FVCreations to ensure your repairs are seamless and durable. We'll walk through the process for different species like white oak, maple, and even the tough black locust. I'll show you how to stop glue from ghosting into the surrounding wood and how to handle vertical applications without the mess. By the time we're done, you'll be able to turn those imperfections into highlights with a quick turnaround time that keeps your project moving.
Key Takeaways
- Understand why the medium viscosity and jet-black tint of starbond black ca glue for knots is the professional secret for mimicking natural pith in woods like maple and black locust.
- Master the "damming" technique with painters tape to handle deep cracks and through-holes without making a mess on your workbench.
- Learn how to tell your repair is 100% cured using the "click" test so you can level it perfectly with a chisel before you start sanding.
- Discover why black CA glue is my favorite way to accent the character in cherry wood, whether the lumber was milled on my property or sourced from a local yard.
- Find out how to adjust your application for porous species like red oak and white oak to prevent the adhesive from soaking in too deep.
Why Starbond Black CA Glue is the Secret to Professional Wood Repairs
I spend a lot of time at my mill processing logs harvested right here on the property, but I also regularly pick up specialty slabs from local lumber yards. No matter where the wood comes from, it almost always has character; which is just a polite way of saying it has knots and cracks. For years, I struggled with clear fillers that looked like plastic or wood flours that never quite matched the grain. That changed when I started using starbond black ca glue for knots. It's a medium-viscosity adhesive that's been specifically tinted to give you a professional, finished look without the long wait times of traditional fillers.
In my workshop, this glue is as essential as my favorite chisel. When I'm crafting one of our charcuterie boards, I often find small voids that don't necessarily need a massive epoxy pour. Using black CA glue allows me to fill those spots and get back to sanding in minutes, not days. Starbond CA glue is a high-performance cyanoacrylate designed for instant structural bonding. It's the perfect middle ground for those medium-sized repairs that need both strength and beauty to survive daily use in a kitchen.
The Aesthetic Advantage of Black Pigment
Most folks think they need to hide every imperfection, but I prefer to lean into them. On a light wood like maple, the jet-black pigment creates a high-contrast accent that looks completely intentional. It mimics the natural look of weathered knots and pith, which are rarely the same color as the surrounding wood anyway. Instead of a "void" look where your eye falls into a deep crack, the black glue creates a solid, dark surface that catches the light. It turns what some might call a defect into a signature feature of the piece. This is especially true on my favorite cherry wood slabs, where the dark filler provides a stunning complement to the rich, reddish tones as the wood ages.
Viscosity and Penetration
The medium-thick viscosity of this specific glue is the secret sauce for a clean repair. It's thick enough to stay where you put it without running all over your workbench, yet thin enough to seep into those tiny hairline fractures that might open up later. This is particularly helpful when I'm working with "punky" or soft wood found inside a large knot. The glue penetrates the loose fibers and stabilizes them, turning a crumbly mess into a solid part of the board. Whether I'm working with the incredibly dense grain of black locust or the more open pores of red oak and white oak, this adhesive provides the structural integrity needed for a lifetime of use.
Step-by-Step: Filling Knots and Cracks Like a Pro
Filling a knot isn't just about squeezing a bottle; it's about setting the stage for a bond that lasts as long as the furniture itself. Whether I am working on a slab of cherry I milled myself or a piece of white oak from the lumber yard, the first step is always the same. You have to get the junk out. I use a dental pick or a small air compressor to blast away loose bark, dirt, and dust. If you leave that debris in there, your glue is just sticking to trash rather than the wood fibers.
Preparation and Safety
Before you reach for your Starbond Adhesives, make sure your wood is truly ready. Moisture is the enemy here. I always check that my lumber is under 12% moisture content; otherwise, the glue might not bite correctly or could even foam up. You'll also want to make sure you have plenty of fresh air moving through your shop. CA glue fumes can be pretty sharp on the eyes and lungs, so I usually keep a fan running or work near an open door. I keep a few fine-tip applicators and dental picks handy for those tight spots in dense woods like black locust.
Application and Curing
When it's time to apply the starbond black ca glue for knots, patience is your best friend. If you have a hole that goes all the way through the board, use the "damming" technique. Simply press a piece of high-quality painters tape firmly to the back of the board to keep the glue from running out onto your workbench. For deep cracks, don't try to fill the whole thing in one shot. Doing that often traps air, which leads to unsightly bubbles in your finished surface.
I prefer to work in layers of about 1/8 inch at a time. After each layer, give it a very light mist of Starbond Accelerator. Don't soak it; a quick spritz from about 12 inches away is plenty. If you use too much activator, the glue can become brittle or even develop a weird white haze. Always aim for a slight "overfill" or a small mound of glue above the wood surface. It's much easier to sand down a bump later than it is to go back and fill a divot because the glue shrunk or settled during the cure. This method works beautifully on everything from the tight knots in maple to the wider cracks found in red oak.
Matching Glue Techniques to Different Wood Species
I've learned through years of trial and error that wood species react to adhesives in very different ways. Whether I am pulling a fresh slab off my own mill or bringing home a stack of kiln-dried boards from the lumber yard, I have to adjust my approach. Sourcing plays a big role here. Lumber from a yard is often bone-dry and will pull the moisture right out of your glue, while wood I've milled and air-dried on the property might be a bit more stubborn. When you use starbond black ca glue for knots, you aren't just filling a hole; you're negotiating with the unique grain structure of that specific tree.
Farmer Vic’s Favorite: Working with Cherry
If you've followed my work for any length of time, you know that cherry is my favorite species to work with. It has a soul that other woods just can't match. The reason I prefer using starbond black ca glue for knots on cherry is the stunning contrast. As cherry ages, it develops a deep, honey-red patina. That jet-black knot stays dark, creating a timeless look that only gets better with the years. To prevent the black pigment from staining the tight grain, I sometimes apply a light coat of sealer around the knot before filling. This acts as a barrier, ensuring the black stays exactly where it belongs and doesn't "ghost" into the surrounding fibers.
Oak and Black Locust Challenges
Working with oaks requires a bit more finesse. Red oak is notorious for its open grain; those pores are like tiny straws that can wick the black glue away from the repair site. If you aren't careful, you'll end up with dark streaks in the wood that are a nightmare to sand out. White oak is a bit more forgiving because of its tyloses, which are natural plugs in the pores, but it still demands a clean surface. Then there is black locust. It's one of the densest woods I handle, often destined for my outdoor items. Because it's so hard, I use the glue to stabilize hairline fractures that could expand in the weather. For maple, the tight grain makes it easy to get a crisp line, but the high contrast means every little bubble will show up if you don't layer properly.
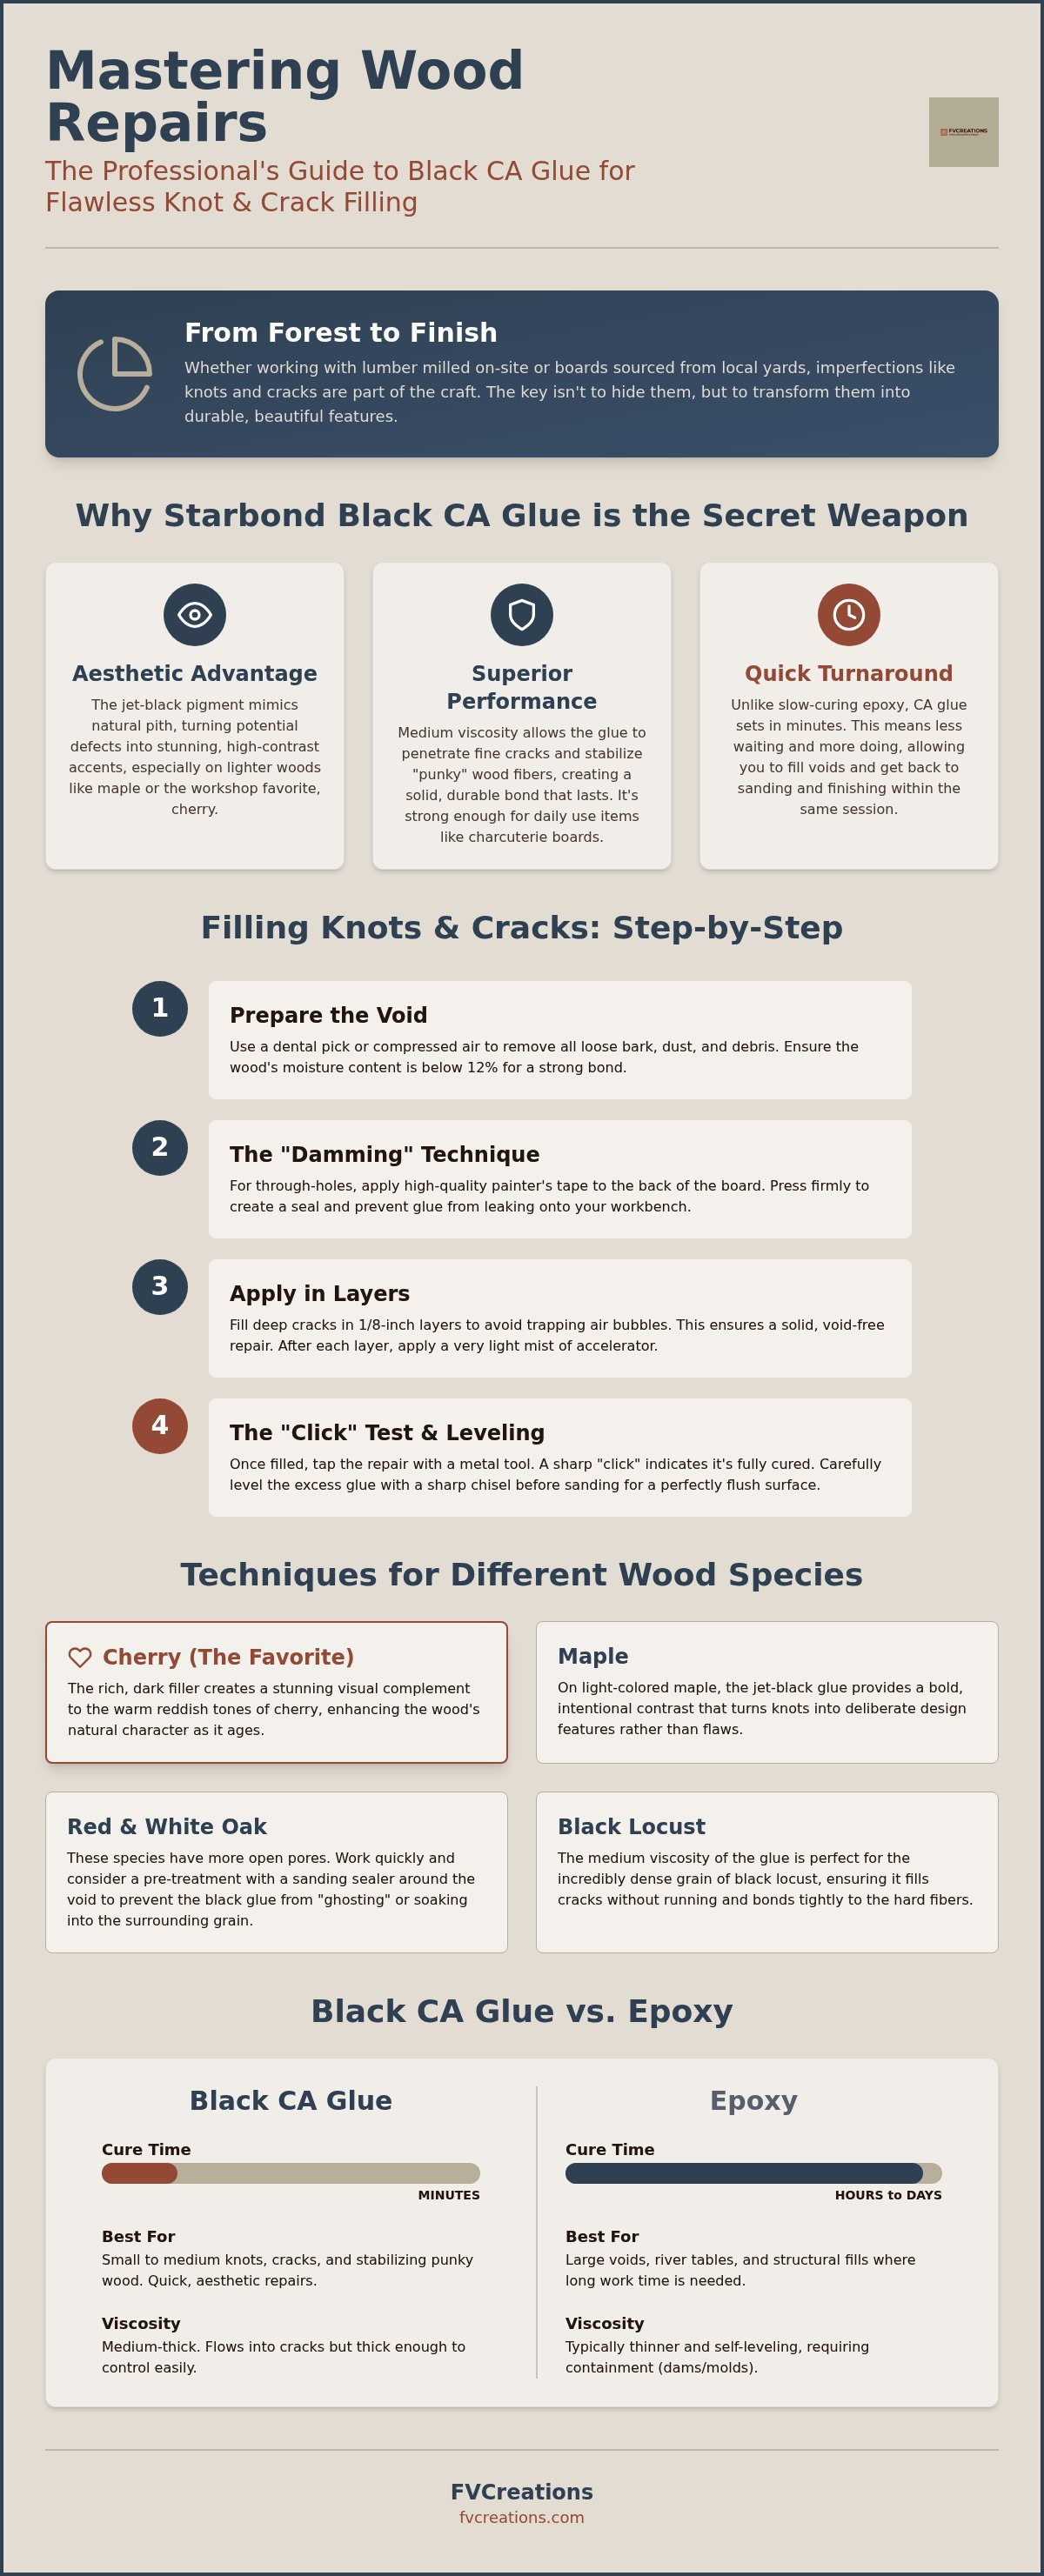
Black CA Glue vs. Epoxy: Choosing the Right Filler
Choosing between epoxy and CA glue is a daily decision in my shop. I often have boards from the local lumber yard that have small drying checks, or slabs I've milled myself that have deep, character-filled knots. If I'm staring at a knot smaller than half an inch, I almost always reach for starbond black ca glue for knots. It's about efficiency. Epoxy is great, but it often requires a 24-hour wait and a lot of prep work. For a busy afternoon spent finishing charcuterie boards, that kind of delay just doesn't make sense.
Wood is a living thing that never quite stops moving. While both adhesives are strong, they handle expansion differently. CA glue is very rigid, which is perfect for those tiny cracks in dense black locust. Epoxy has a bit more give over large spans. I've found that for most shop repairs, the cost-effectiveness of a small bottle of Starbond beats out the waste of mixing up two-part epoxy that I might only use a fraction of. For everything else, starbond black ca glue for knots is the better choice for maintaining a steady workflow.
When CA Glue Wins
CA glue is the king of the "oops" moment. I've been in the final sanding stages of a maple table and spotted a tiny hairline crack I missed. Instead of stopping for the day, I can fill it, spray the activator, and be back to sanding in five minutes. It's also my go-to for stabilizing bark inclusions on live-edge cherry pieces. It soaks into those loose fibers and locks them down tight without the mess of a full epoxy pour. It's the perfect tool for those finishing touches that make a piece look professional.
The Case for Epoxy
There are times when the defect is just too big for cyanoacrylate. If I have a structural void or I'm looking for that "river" effect in a large piece of red oak, I'll switch to epoxy. Epoxy handles massive volume much better and won't get brittle in deep pours. It's also the right choice if you need total transparency; starbond black is meant to be opaque and bold. For those massive projects, the wait time is just part of the craft, but for everything else, the speed and cost-effectiveness of CA glue keep my shop running smoothly.
If you want to keep your projects moving without the long wait, you can pick up the same Starbond Adhesives I use right here in the shop.
Sanding and Finishing Your Starbond Repairs
Once you have filled your voids, the hardest part is often just sitting on your hands. I never start sanding until I hear the "click." I take a small metal rule or a screwdriver and lightly tap the surface of the repair. If it makes a sharp, plastic-like sound, the starbond black ca glue for knots is fully cured. If it sounds dull or feels slightly gummy, it needs more time. Rushing into sanding a soft repair will just gum up your abrasive and pull the filler right out of the wood fibers, especially on porous species like red oak.
Mechanical leveling with a sharp chisel is my first step before I even think about reaching for a power tool. I lay the chisel flat on the board and gently pare away the excess mound of glue. This prevents "dishing," which happens when you sand a divot into the wood around the harder glue. On dense woods like black locust or white oak, this manual approach is essential. Once the glue is nearly flush with the wood, I move to the sanding stage to blend everything together seamlessly.
Sanding Techniques for a Flush Finish
I always use high-quality sandpaper to ensure I am actually cutting the glue rather than just heating it up. Heat can cause the CA glue to soften or smear, which is a disaster on a clean piece of maple. My grit progression usually starts at 80 or 100 grit to get it perfectly flat, then I move to 150 and finally 220. A quick "pencil trick" helps verify the work; I scribble a light line across the repair and the surrounding wood. If the pencil mark disappears evenly, I know the surface is perfectly level. This is particularly important for my favorite cherry wood slabs, where the light hits the tight grain and reveals every tiny imperfection.
Oiling and Protecting the Repair
The final reveal is the best part of the whole process. When I apply a finish, that dull, greyish-black patch instantly transforms into a deep, jet-black accent. For items heading outside, I apply Outdoor Defense Oil. It provides a breathable barrier that helps the wood and the glue stay bonded through the seasons. If I am working on a decorative piece, Real Milk Paint finishes interact beautifully with the cured glue, allowing the black knot to stand out as a natural feature. Whether the lumber was personally milled on my property or brought in from a yard, a well-finished repair with starbond black ca glue for knots ensures the piece stays stable and beautiful for decades to come.
Master Your Next Build with Professional Repairs
Working with wood is a constant conversation between the maker and the material. Whether you are milling white oak on your own property or picking up a cherry slab from a yard, imperfections are just part of the story. You now have the techniques to turn those cracks and voids into beautiful, intentional accents. Remember to clean your knots thoroughly and apply the glue in thin layers to avoid trapped air. By waiting for that solid "click" before you level the surface with a chisel, you'll get a professional, flush finish every time.
I've personally vetted starbond black ca glue for knots on my own handcrafted furniture and charcuterie boards to ensure it stands up to daily use. It's the same reliable system I use for every project that leaves my workshop, especially when I'm working with my favorite cherry wood. Shop Farmer Vic’s Favorite Starbond Adhesives and start elevating your own craftsmanship today. There is a deep satisfaction in taking a piece of raw lumber and refining it into something lasting. I can't wait to see what you create in your own workshop.
Frequently Asked Questions
Is Starbond black CA glue food safe for cutting boards?
Yes, once the adhesive has fully cured, it is generally considered inert and safe for incidental food contact. I use it regularly on the charcuterie boards I sell in my shop. To ensure the best results, I always recommend applying a high-quality, food-grade finish like Tung oil over the entire surface after you have sanded the repair flush. This adds an extra layer of protection between the food and the stabilized knot.
How do I prevent black CA glue from staining the surrounding wood grain?
Staining, or ghosting, happens when the thin glue wicks into the thirsty pores of the wood. To prevent this, apply a light coat of sanding sealer or a bit of finish to the area surrounding the knot before you fill it. This seals the end grain and acts as a barrier. It is a vital step when you use starbond black ca glue for knots on light-colored species like maple or white oak where any bleed would be obvious.
Can I use black CA glue on outdoor cedar planters?
You can certainly use it to stabilize small knots or hairline cracks in your cedar projects. It handles the natural expansion and contraction of wood quite well; however, for massive structural gaps in outdoor furniture, I usually rely on mechanical fasteners or larger epoxy pours. For the typical character marks found in the cedar planters I build, this glue provides a durable, weather-resistant bond that keeps the board's integrity intact for years.
How long does Starbond black CA glue take to fully dry?
The drying time depends entirely on the thickness of the application and whether you use an activator. A thin layer will air-cure in about ten to fifteen minutes. If you are filling a deep void in a piece of black locust, it might take longer. When you use the Starbond Accelerator, the surface sets almost instantly, but I still recommend waiting a few minutes to ensure the core of the repair is solid before you start working it.
What happens if I use too much accelerator on the black glue?
Using too much activator is a common mistake that can lead to a brittle repair. If you soak the glue in spray, it can cause the adhesive to "boil" or foam up, which creates tiny white bubbles and ruins the jet-black look. A single, light mist from about twelve inches away is all you need. If the glue turns white or cloudy, you've likely over-applied the spray and may need to scrape it out and start over.
Can I sand the glue immediately after applying the activator?
I don't recommend sanding the second you spray the activator. While the surface might feel hard, the glue underneath can still be liquid, especially in deep cracks. If you start sanding too soon, you will gum up your sandpaper and potentially pull the wet glue out of the hole. Always perform the "click" test by tapping the repair with a metal tool. If it makes a sharp, crisp sound, you are ready to move forward.
Will the black glue fade if exposed to direct sunlight?
The black pigment in the glue is very stable and won't fade significantly under normal conditions. However, the wood species around it will definitely change color as it patinas. For example, my favorite cherry wood will darken into a rich red, while maple might turn more golden. The black filler stays consistent, which actually helps the knot look more natural as the piece ages and the contrast between the wood and the filler evolves over time.
What is the best way to store my Starbond glue to prevent it from hardening?
To get the most out of your starbond black ca glue for knots, store the bottle in a cool, dry place away from direct sunlight. Many makers, myself included, keep their unopened bottles in the refrigerator to extend the shelf life. Just make sure the tip is wiped clean and the cap is snapped on tight after every use. If you keep the moisture out and the temperature steady, a single bottle can last you through many seasons of shop projects.